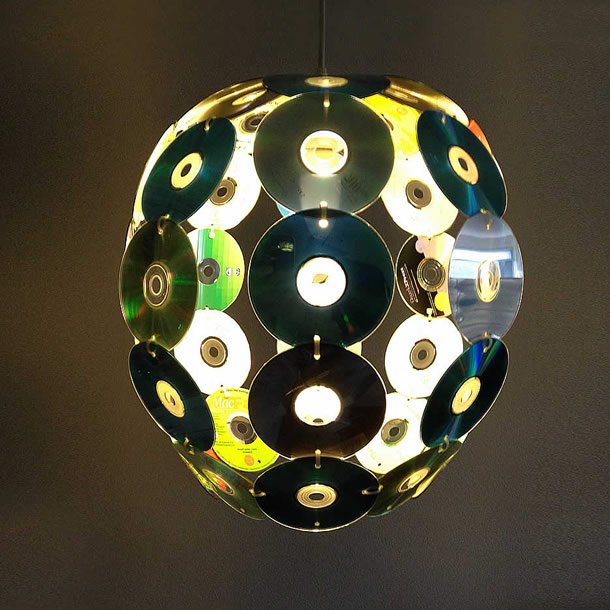
This upcycle design piece has been featured before on this blog. Once in a while upcycleDZINE likes to look at its archive to republish a post that lots of new visitors haven’t seen and/or read before.
And this time the CDegg is the chosen design. CDs have been featured before on upcycleDZINE. NEW WAVE suspension by Veronique Lamarre and DATA by YEAYEA are two examples of what you could do with discarded CDs. When I saw these upcycle designs I immediately thought of my CDs that would no longer be used.
It’s incredible how time flies. I remember, yes here we go, that spending hours and hours listening to albums in the record store and recording songs for friends and for my walkman on an audio cassette tape. Then came the CD and eventually the DVD. And everybody thought that these silver and gold shining discs would last forever. But no, the digital age was just starting and the mp3 made its appearance along with downloadable movies. And it seemed that these files where here to stay for quite a while. But no again, streaming is the way these days where many of us listen to music and watch movies. So there’s almost no necessity for those discs anymore. Change after change.
Your old CD collection will continue to shine
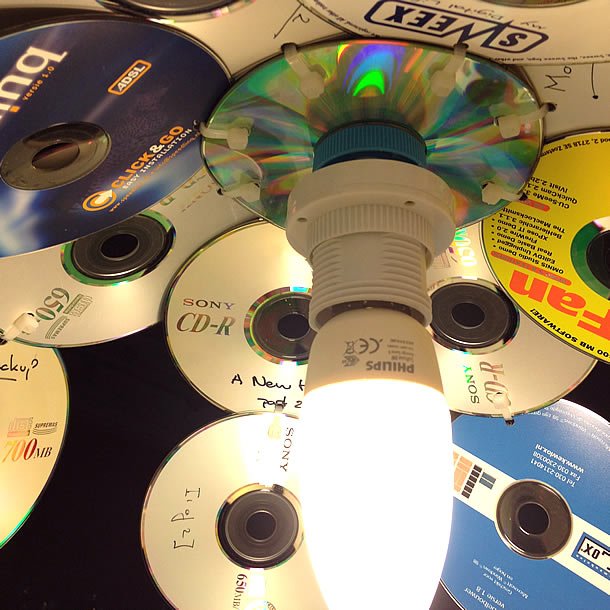
Well what about my collection of digital discs? Well I took those CDs for further investigation and found out that there where 64 CDs and DVDs [excluded are my favorite movies and CDs] that I could throw away because the software on them was old, songs and photos where on my iMac and old files weren’t needed anymore. But throwing away such great shiny objects was not what I had in mind. No, I wanted to see what kind of simple upcycle design lampshade or pendant I could come up with. Here’s a short description on the process of making this pendant.
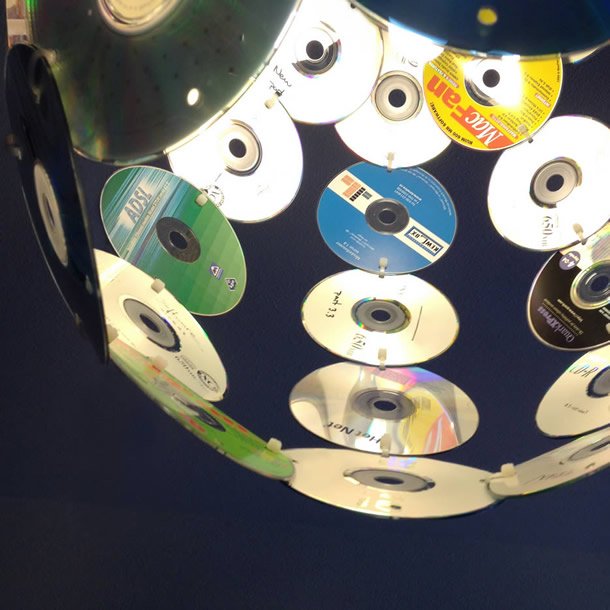
First I had to figure out a way to work with these discs and I noticed that making holes with a drill was the thing to do. After that I could work the way I did with some of the other designs I had already made. First I drilled a whole lot of holes. Every disc needed two holes, except the top one and the bottom discs. The double layer at the top needed eight holes and the discs at the bottom 3 holes. My collection of discs mainly consisted of two colors, blue and silver. So I arranged this collection on a table and divided them into 8 series of 5 discs each. Next it was time to use the familiar tie-wraps to connect the series and make a string out of them.
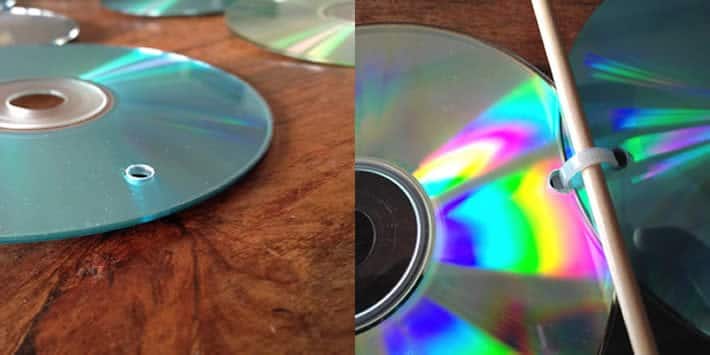
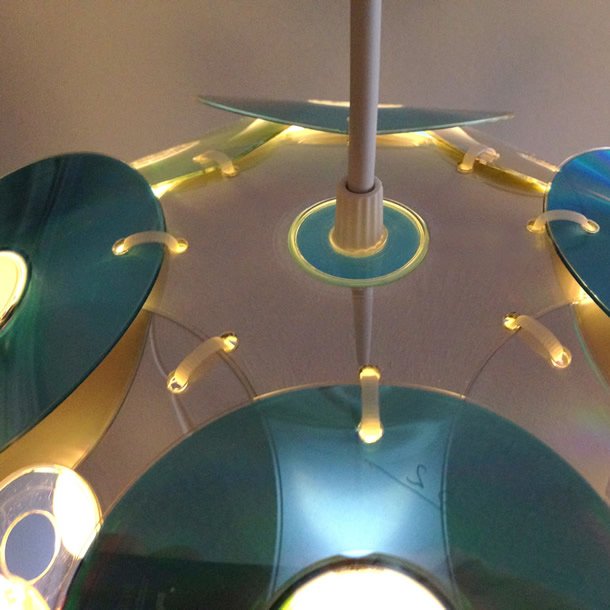
Last part was to connect the strings to the top discs and eventually the bottom ones to each other. Because of the tension in the design you get this elegant shape after the bottom discs are connected and the bottom part stays open.
Photos © Gilbert de Rooij
The top is a bit tricky because I wanted to use the hole that’s already in a disc. I used regular parts from a standard pendant light from IKEA and even a milk carton cap.
If you’re looking for a ‘new’ shiny design in your living room and you’ve got some old CDs and DVDs lying around, this might be a DIY for you. Have fun.
What you’ll need:
- 42 CDs or DVDs [+1 as a template for the holes]
- Drill and drill bit 4 mm.
- Scissors
- Basic cord set like IKEA HEMMA
- Tie-wraps, 20 cm. / ± 3 mm.
Please share your result and/or findings with me!
Looking forward.









Great way to see one’s CD’s again instead of those laying in the drawers or something without further use, COOL!!
Thanks for your compliment!
Next one is going to be made by using my music CD collection after I converted them to mp3. Not sure which side should be outside and which should be inside 🙂
This is really neat and would work in the basement rec room or even my grandsons Man Cave. I took a look at his Man Cave while he was away last weekend and it is really neat so I might just have to make one for him. thanks for the great idea. Lily C Canada
Thanks Lillian for your nice comment. If you’ve got any questions, just let me know.
this is so dang cool i love it xx
Thanks Chris. I’m thinking about another CD design lampshade or pendant 🙂