
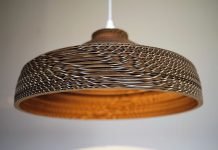
Today I’m adding another DIY upcycle lampshade to the other upcycle design lampshades I made. Again it’s a design that uses discarded plastic milk cartons. I’ve already made some lampshades with these cartons but I feel that there are more designs to be made out of these everyday objects. The DROP lampshade inspired me to make this design. And the best thing about using this ‘system’ is that I’m able to make all sorts of different lampshades that eventually can turn into a series or collection. But first things first, more about the process of making this lampshade.


Photos © Gilbert de Rooij
After cuttting out pieces I started joining them by using an ‘Eyelet Crimping and Hole Punch Function Pliers‘ and eyelets. This way I was able to create strips from the plastic pieces, with a certain length so they would give the lampshade a different look. In the end I fixed all 9 strips at one of the ends with a small bolt and nut. The other 9 ends I attached to a lamp frame. And that’s it.
Well all in all it’s, just like the DROP, a reasonable easy lampshade to make.
What you’ll need:
- 18 [+1 spare] Plastic milk cartons or other sturdy plastic
- Small snap-off blade knife
- Scissors
- Eyelet Crimping and Hole Punch Function Pliers with eyelets
- Bolt and nut, M4 / 16 mm. [hexagon socket screw, inbus]
- Lamp frame [in this case 20 cm. diameter]
- Tie-wraps, 20 cm. / ± 3 mm.
Please share your result and/or findings with me.
Have fun!
Design and DIY by Gilbert de Rooij | upcycleDZINE










Beautiful – how do you cut the pieces?
Thanks for visiting upcycleDZINE and for asking. I just used scissors.
I made one piece and used it as a template for cutting.
Not every piece is exactly the same, but that’s no issue.
Success and maybe you could let me know how your lampshade turned out.
Cheers, Gilbert
Thanks for the lovely Idea. I was wondering what you could make out of these.